
Chaos aboard
A warning, this blog is about boat job no fancy sailing adventure.
Long time since last blog, mainly due to a lot of parallel and unfinished boat projects, this has resulted in some chaos aboard. Add to that, lack of knowledge/competence and waiting for parts and services that have been delayed, thus not much to write about then. Covid has of course had a major impact on our life as well. In Lagos, Portugal where we live, the restrictions have been very firm, restaurants been closed, as well as shopping centers. luckily DIY shops and the chandlers have been open. Restrictions on if and when one can leave the local community, limitations in meeting friends outside, beaches has been closed etc. So very pleased that we have had Kerpa so close, else we would have not to much to do, been working on Kepa more or less on a daily basis. We have been in Sweden two times during this period, visiting our kids for Christmans, and meet our latest grand child this spring, a delight . There is a remarkable difference in how Sweden and Portugal have handled the Covid issue, In Sweden from our perspective, life had continued as normal, very few with face mask, restaurants open, the total opposite to the rest of Europe. Cruising plans has be changed several times. The latest plan? is that we will cross the Atlantic from Cap Verde late Oktober for landfall in French Guyana, slowly going north, maybe Christmas in Tobago.
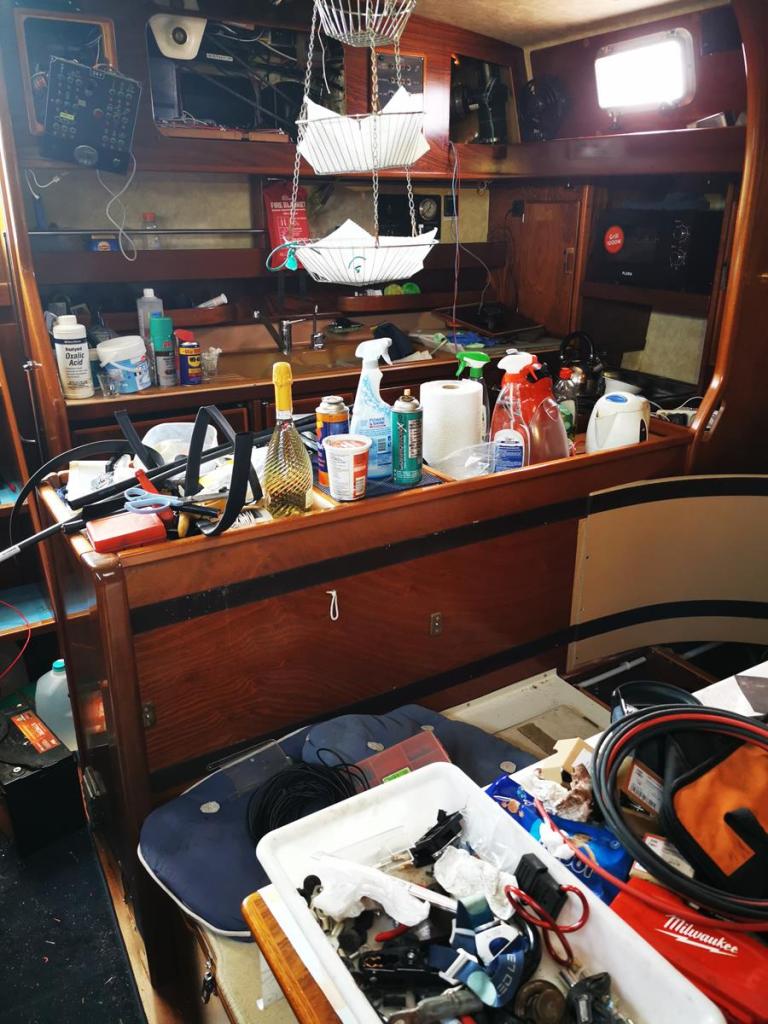

The main project for this season was to install an DIY LiFePO4 battery pack. A project at the edge of my knowledge and capability. I had a relatively clear idea what components I needed, but only a vague idea on how to design it, most of the design was made as the project proceeded and resulting in some redesigns along the way as I found out smarter ways for layout. All this of course added to the chaos and to some frustration.
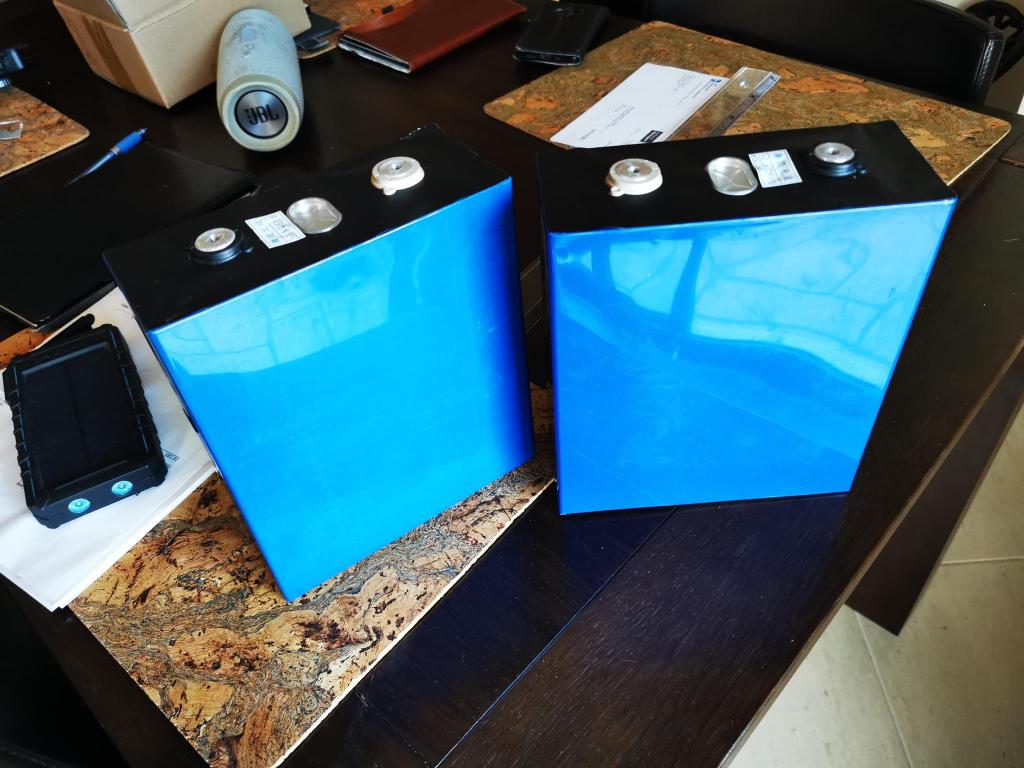
I ordered 16 LiFePO4 271 Ah cells from China, they were offered including freight, customs and VAT, and about 40 days after order they arrived, and appeared in good conditions, one had a very small dent and one had slightly different color on the negative terminal. If that is of significance or not future will tell. I have read in various forums of poor second-hand Chinese Li cells, as well as I have read about them who have bought and used Chinese cells successfully for many years. The difference in price buying direct from China instead via an European distributor is at least a factor two. I really hope we will be pleased with our cells and installation. The cost for the 16 LiPO4 cells was about the same as for 440 Ah 24v Victron Gel batteries
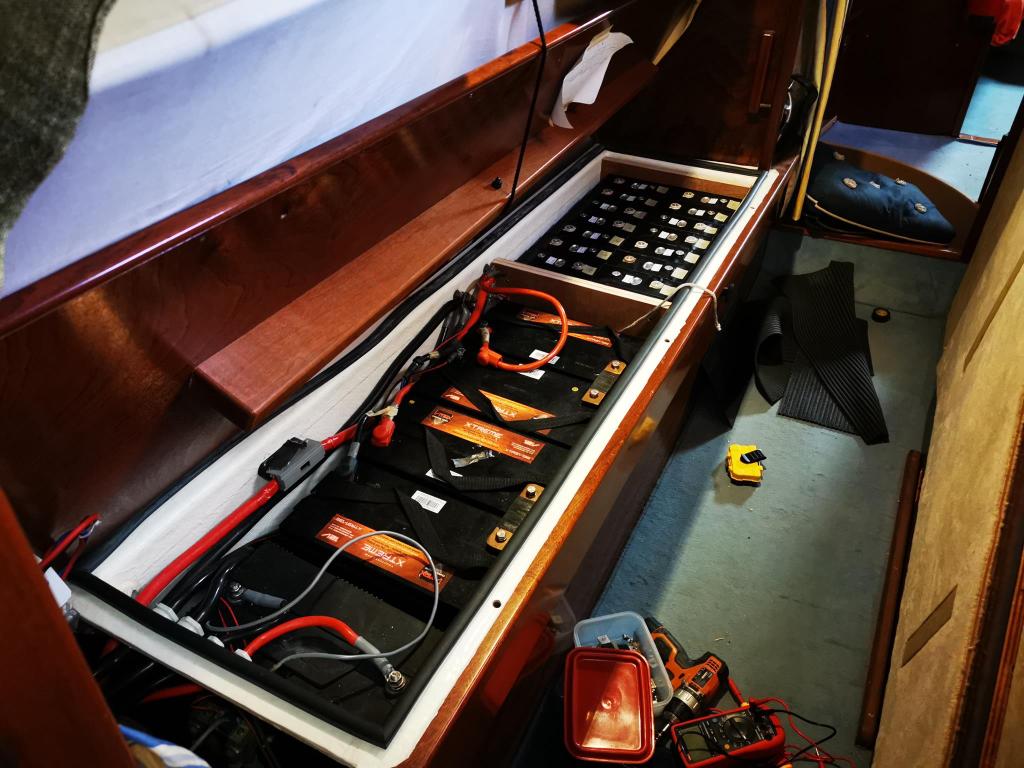
In the picture I have taken out half of the old battery bank and placed the new Li cells (540 Ah, 24v) in what I thought was the best place. Already now obvious how much less space they require.
But before proceeding I had to trace what users all the old main cables from the battery switch are supplying, that was a rather time consuming and tedious task!
And of course, one of the terminals on the main switch broke off in the process
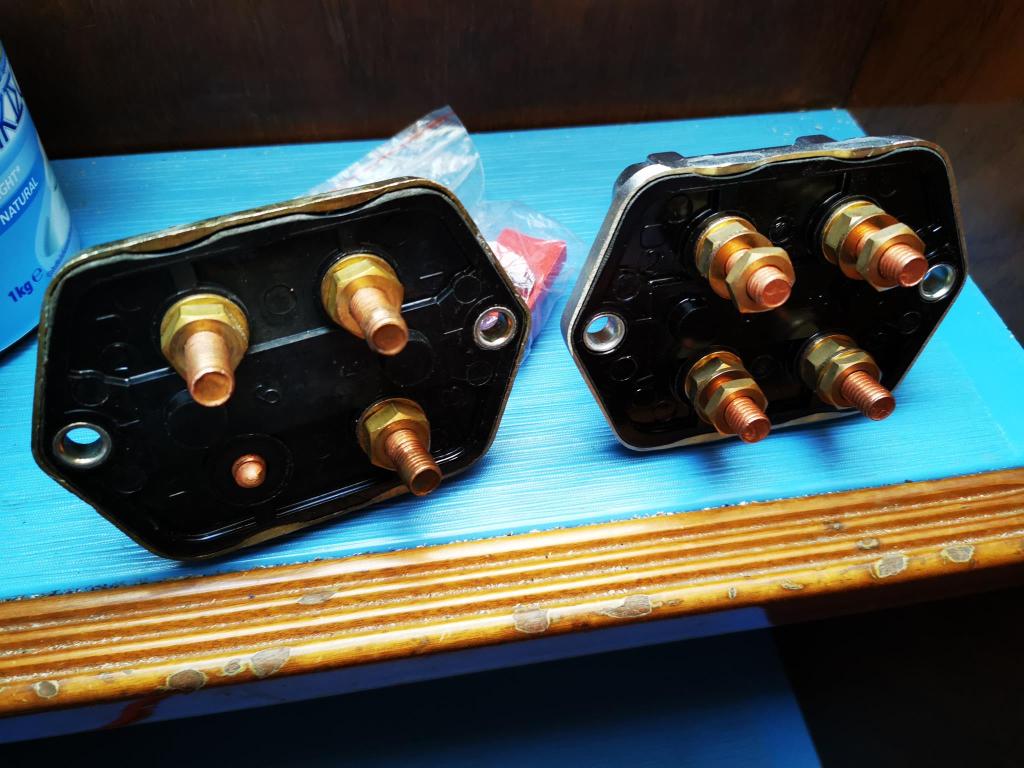
“Luckily” Amel have the switches in stock, but it set you back 330 Euro!
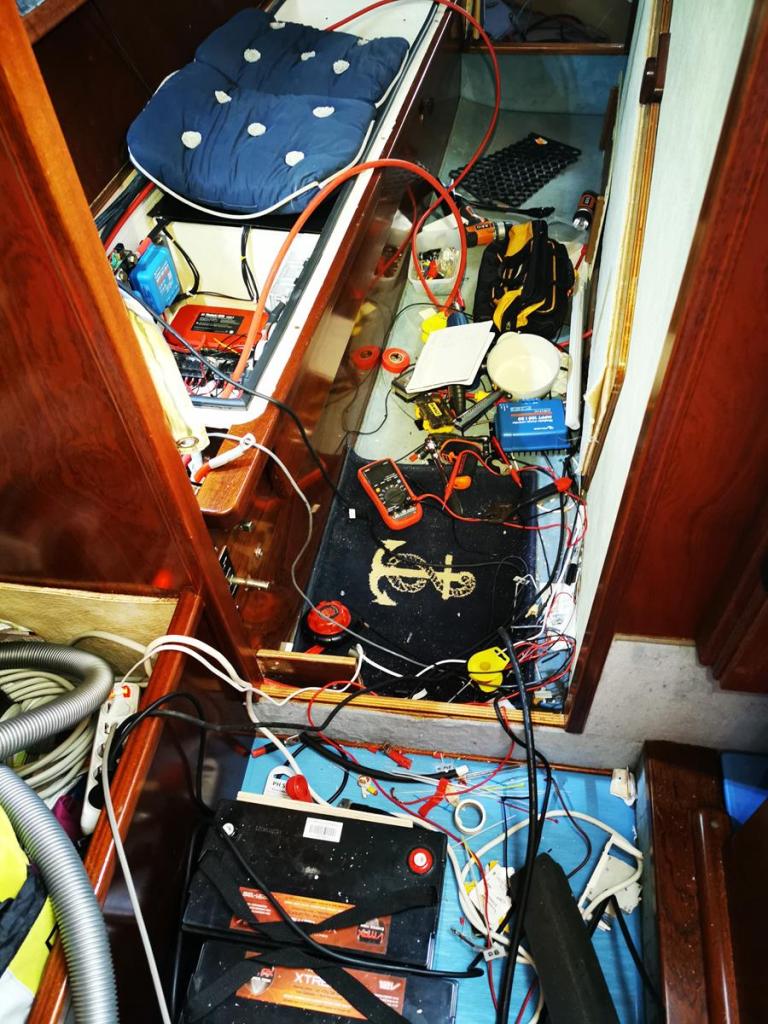
We have two switches on for the positive side and one for the negative side of the system, and as you might notice it is 4 terminals, each switch handle both the 12 and the 24 v side. Instead for all the main cables going direct from the Main switch direct to the consumers, I installed fuses on each of the main cable.

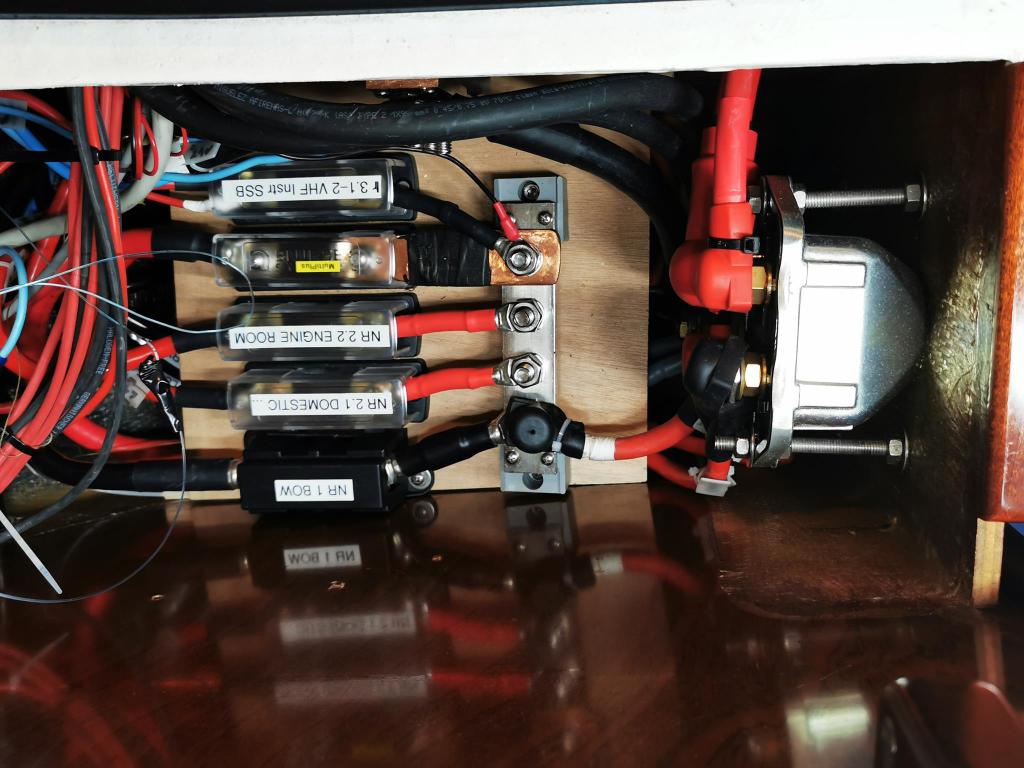
Fuse work in Progress
The hart of the system is the Battery Management System (BMS), I chose one from a Swedish supplier, the MasterLi, it came at a price, that made my hesitate a bit, but in the end I felt I made the right decision, I got a lot of help from Thomas the seller when installing the system, very grateful for that. And it is also a very well thought out concept.

The two 75 Ah batteries to the left in the pictures are the AUX battery, the one in the centre is the starting battery.
One of the benefits with this BMS is that it support the use of an Auxiliary (Aux) battery, when the LI pack is fully charged the Charge relay opens the charge goes to the Aux battery, not only protecting all chargers from being damage when exposed to an open circuit, it also a give redundancy in case there is a problem with the Li Pack, If that happens, we still have 75 Ah capacity to run navigation and communication, an important safety aspect. Some other feature is that you can control other equipment’s by the BMS, such as an Victron Multi Plus charger/inverter and control the field winding on your alternator to avoid damage to the alternator regulator.
When using Li cells with Aluminium casing one need to place them in a compression box to prevent them from swelling in case of overcharging them. see video clip below
The most common way to arrange 16 cells in a 24 v system is to connect two cells in parallel and then the 8 pair of them in series, called 2p8s in Li language.

above you can see the 8 pairs of Li Cells and the wire for balancing
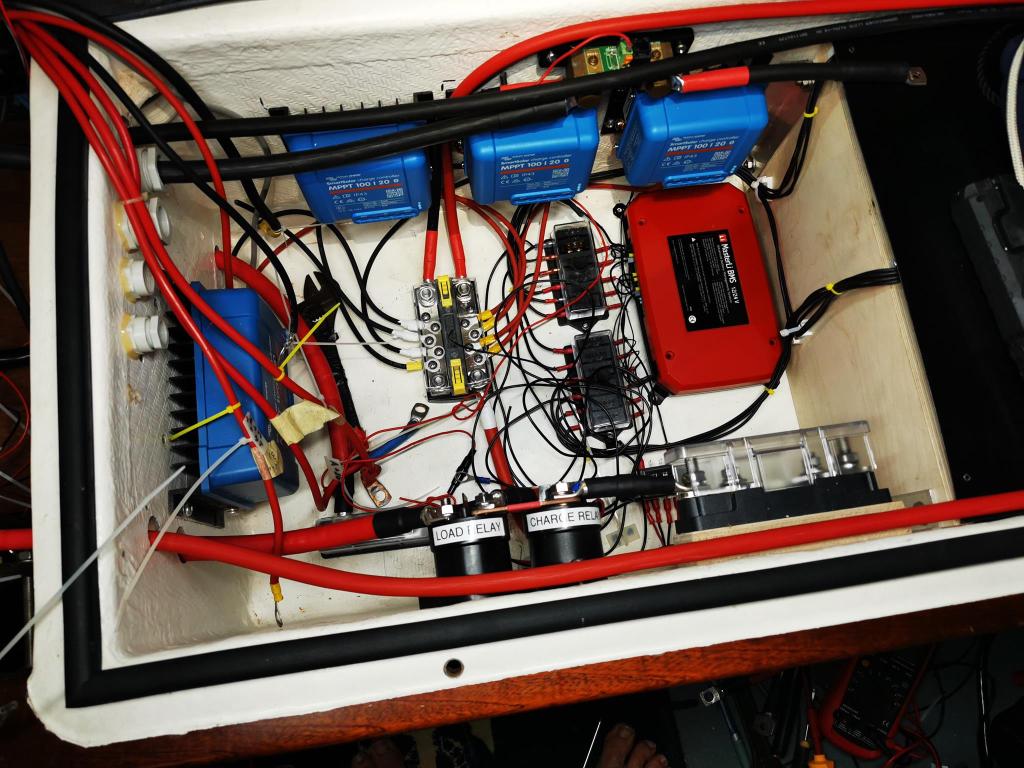
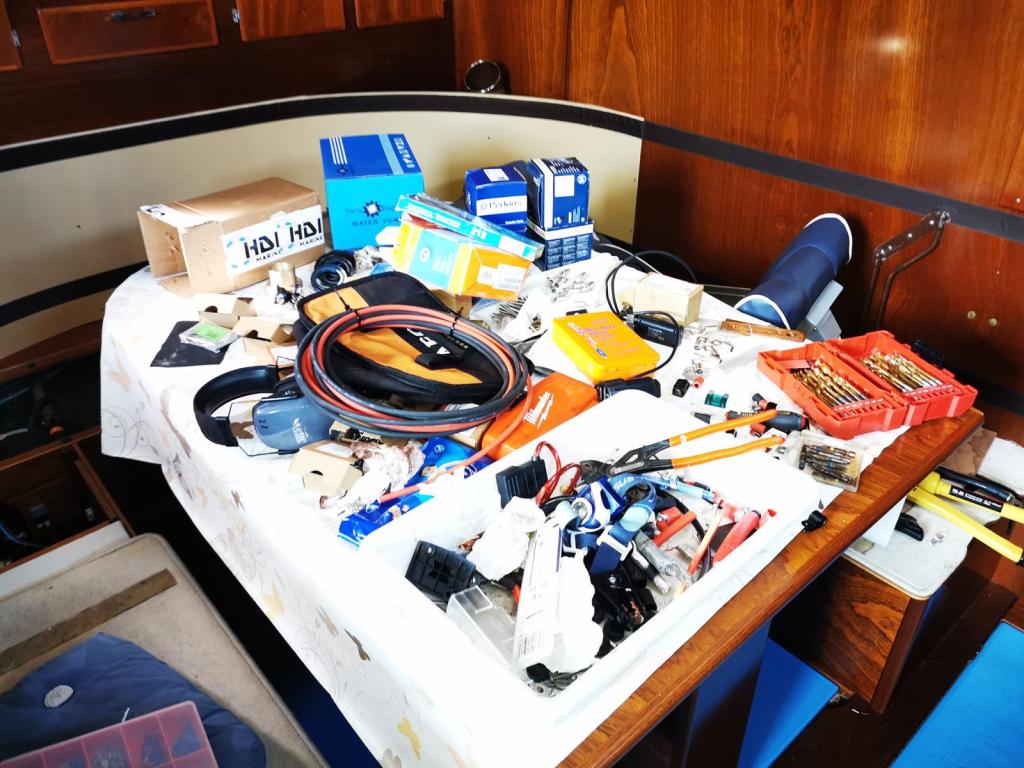
Work in progress placing Solar controllers, contactors and fuse-boxes etc, not so easy to bend the thick cables and place them on the studs, and also have a logical routing for all the cables.
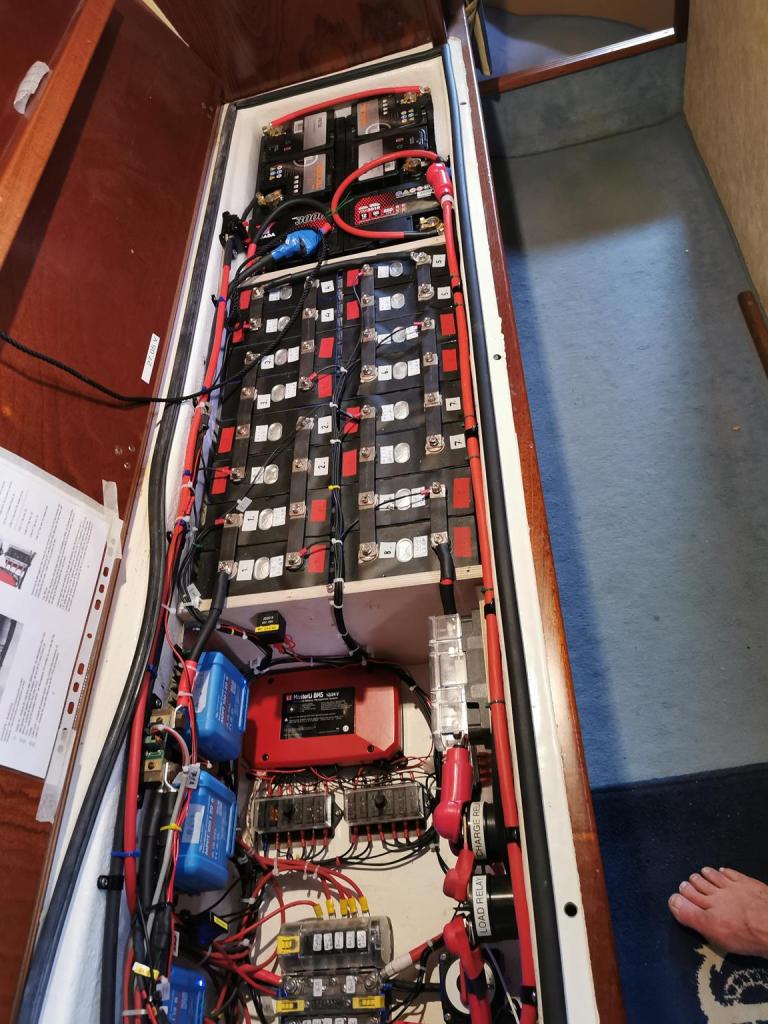
But finally, I got all things in place.
More solar power
Now with the new batteries I wanted to increase the solar power on my solar arc, so I ordered 2x400w Sunbeam panel supposed to have the highest efficiency, they give a few advantages towards the old 3×150 watt set up, that was in series. In general if you put your panels in series they will be much more sensitive for shadow, compared to have them in parallel. The old panel was nominal 12 v so need to have them in series to charge a 24 v system, the new panels reach over 60 volt, and I have one MPPT controller for each, so eventual shadow on one panel have no effect on the other panel. Now I have 800 w on an area just a fraction larger than what the old 450 w panels required.

The new panels were stored under Kerpa while working on the Li project.

The arc after removing the old panels.

A bit dangerous job high up from the ground

Safer to work from the platform.
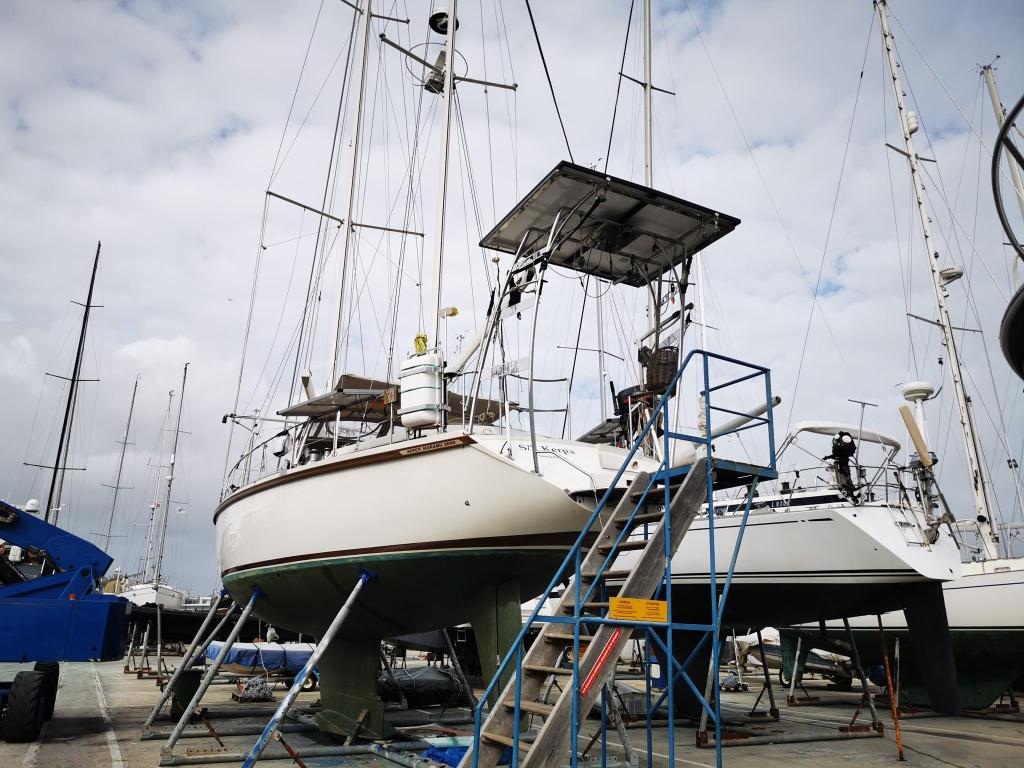
Ready 800w, total area 210 cm by 170 cm.
While I was at it I decided to replace the 2x100w 12 v panels that we had on the bimini, with custom made semi flexible panels from Hovall in China, sounds expensive to purchase custom made panels, but it does not need to be. The panel it self 2×150 w 36 volt cost less than 400 euro, but freight in Covid times, customs and VAT, and some miscommunication that caused the panels to be sent back to China!!!, made the logistic cost close to 900 euro!!

The arrived well packed in a wooden box.
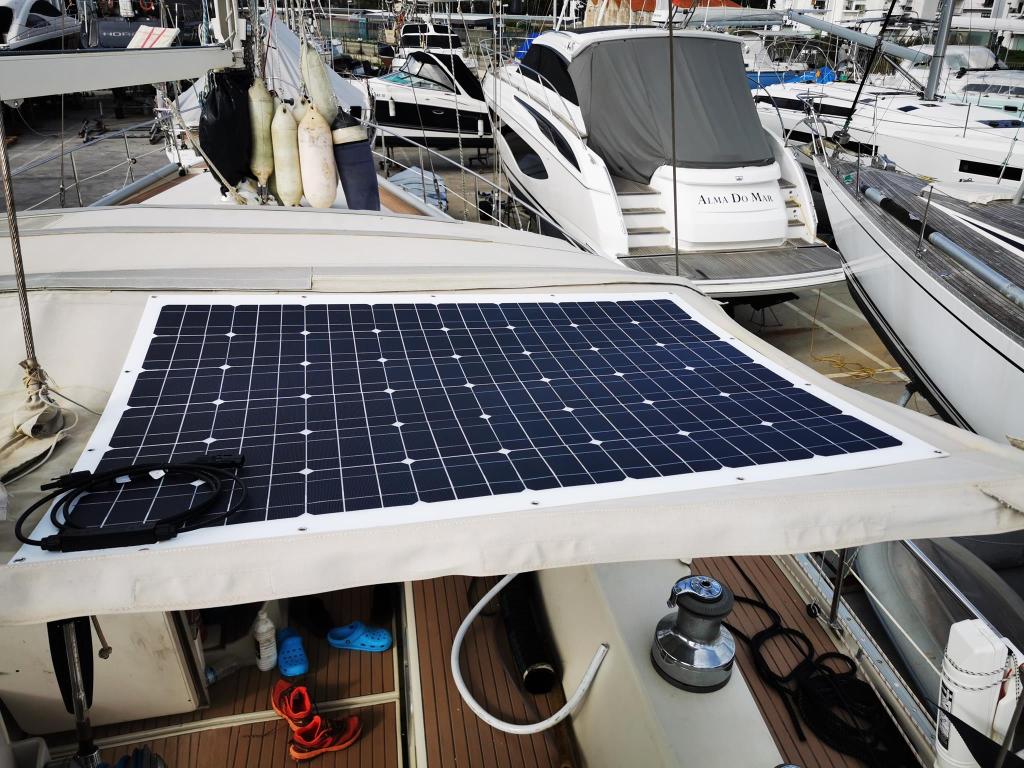
And looked rather well when fixed to the bimini, but doubtful if i would do it again.
Now we have in total:
2×400 watt on individual MPPT controller, ridged panels on the Arc
2×180 watt in parallel on one MPPT controller, ridged panels on the rail
2×150 w in parallel on one MPPT controller, semiflexible panels on the bimini.
We have had the system up and running for a few months both while on the hard and now lately living aboard. Only have part of all the solar panels activated at the same time as it gives more that we consume now. Guess it will be different during wintertime in the Caribbean when days are much shorter.
But if any other solar nerd reading this, below follow some interesting numbers so far for each set up
The 400 w Sunbeam panel have produced 2,91 kwh at best, and 2,7kWh is standard during a normal day in the Algarve during the period late May early June.
The 2×180 w on the rail gives about 2,3 kWh/day
The 2×150 on the bimini only around 700 Wh,
Total if running all panels, we would exceed 8kWh/day. Normal voltage is 26 v, so 310 Ah /day.
Electric consumption
With all this charging we now need to consume the electricity generated. Therefore, we have installed an induction hob on top of the Gas stove, it is semi-permanent, quite easy to convert back to gas. The reason for this set up is to; Be more independent, do not need gas. Low investment a two-burner induction hob does not cost much, and by placing it on top of the old gas stove very easy installation and maintained gimbals function, still able to run the oven on gas if we so desire.


The silicon pads on top of the hob work as a very efficient anti-skid without interfere with the heating.
We consume about 30 Ah when making Spaghetti Bolognaise, which require a lot of simmering, so definitely above average for a dinner aboard Kerpa.
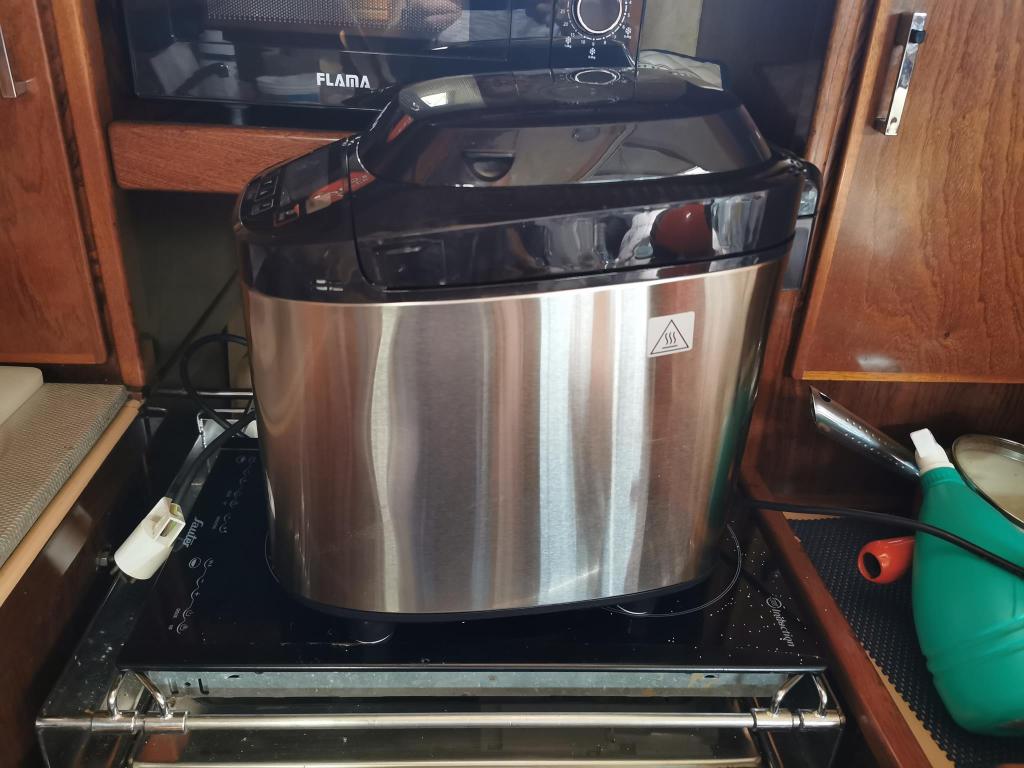

We have now also a baking machine. Consume ca 18 Ah for a loaf of bread, a loaf last ca 3-4 days, so we bake about two times a week.
More electricity work/issues
I have mounted shunts for each fridge & freezer.
Now we can see how much energy each unit consume.
The small 35 l freezer on average about 15Ah but that varies a lot, dependant of how often we open it and of course the ambient temperature. We have had reading from 10-21 Ah a day the low numbers when not open it at all a less hot day, the 21 Ah when loading it with goods and taking things in and out several times during a day (making drinks, ice is nice to have aboard).
The larger box +/-85 litre between 20-30 Ah a day, but we do not open that very often.
The front opening fridge (110l) consumes 25-30 Ah, but that will be replaced, more about that in next blog.

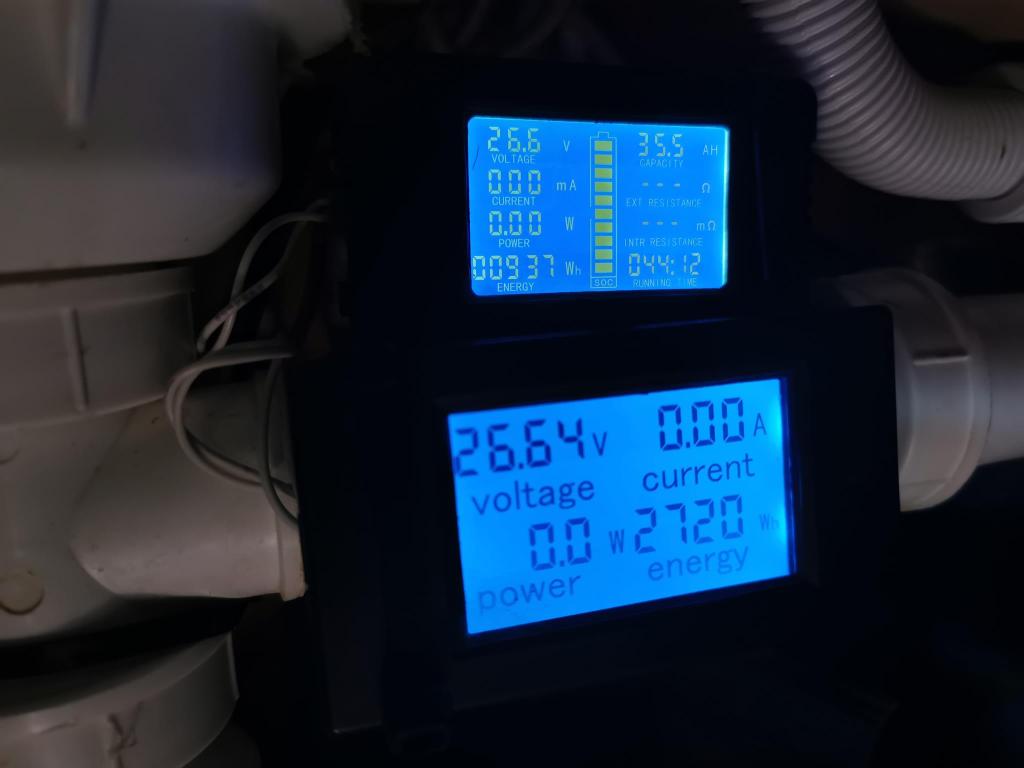
I have an energy meter also for the inverter to see how much energy we consume from that source, I’s only been in operation for a few days but so fare we consume about 80 ah/day that way.
We have no problem in making hot water by running via the inverter. Still plenty of energy in the Li batteries. Another of the great advantages with Li technology is that they take full charge more or less until they are fully charged due to very low internal resistance, and you can run them down to 20% SOC without any problems.
Boring reading? Probably yes unless you are very much into boat electricity.
More boring stuff to follow.


Replaced my old 24 v to 12 v converters, the big old green ones are rated at maximum 8 A, the new small blue ones are rated for 20A and more efficient. If you have followed the blog, you might remember that when we crossed the Gulf stream in rough weather, Kerstin felt the smell as from a fire, it was not a fire, but it was one of the 24v to 12v converters that was very hot, I measured 130 C with my IR thermometer. A bit critical, it was pitch dark, very rough conditions and risk of shutting down our navigation system. There were two reasons for the overheating. More and more navigation equipment been added over the years, and to much things in the cupboard where they were placed preventing proper ventilation. A portable fan was the remedy at that moment it cooled down the converter enough. Now we do not need to worry about that any longer.
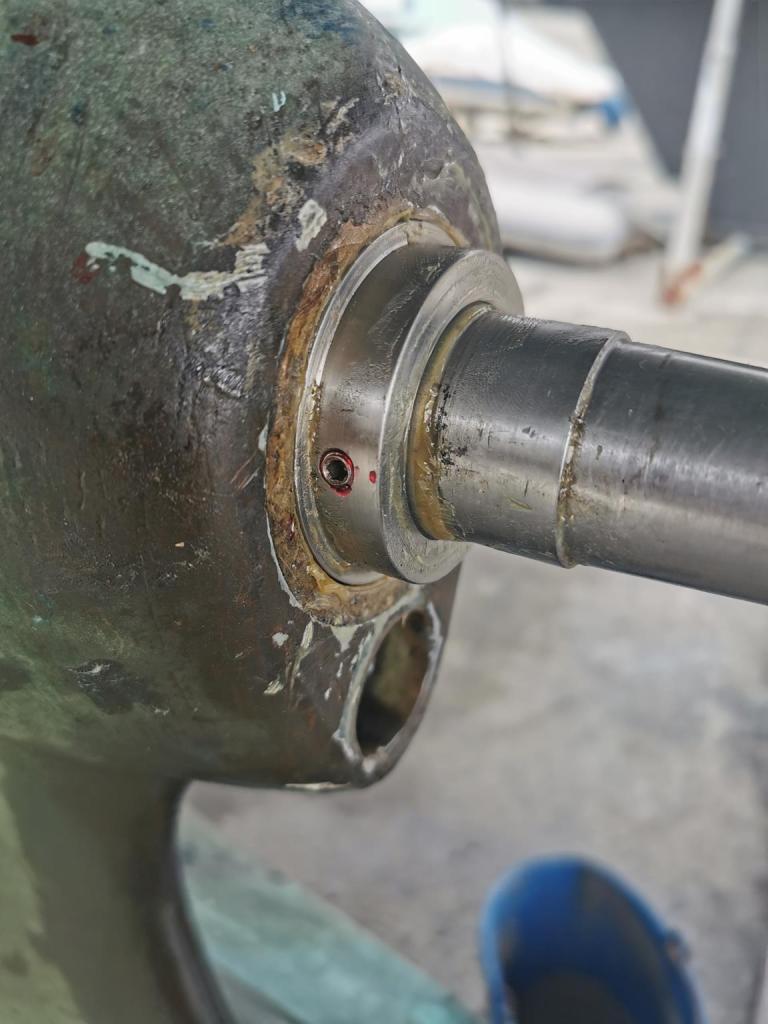


New Propshaft Bushing and lip seals installed this time I had a 316 stainless-steel bushing made.
The Autoprop has been overhauled new bearings and seals.
The copper coat has been upgraded with a few new coasts.
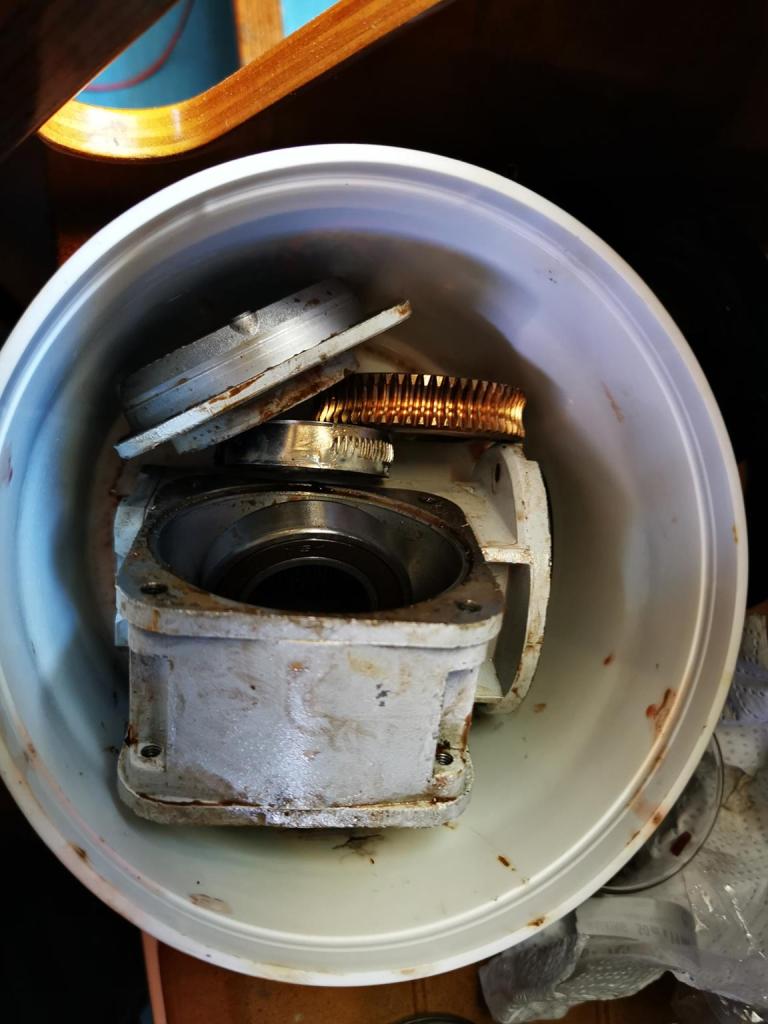
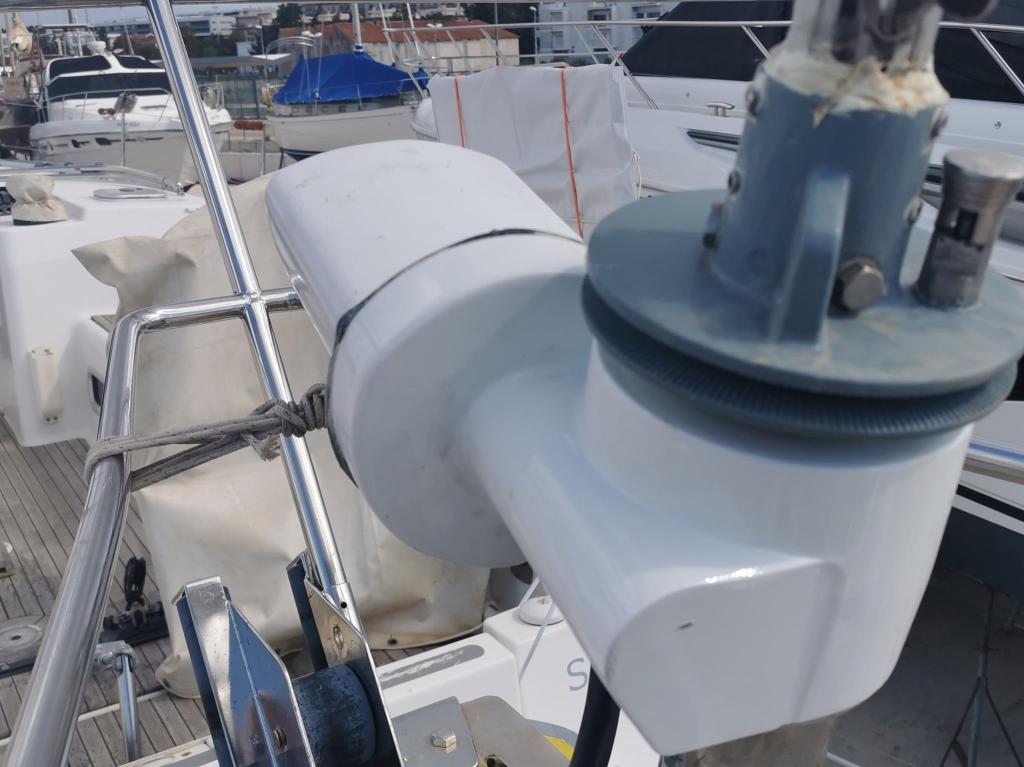
Bow thruster

The bow thruster once again has been overhauled, now it looks as it works, we have used it a few times, but still keep my fingers crossed.
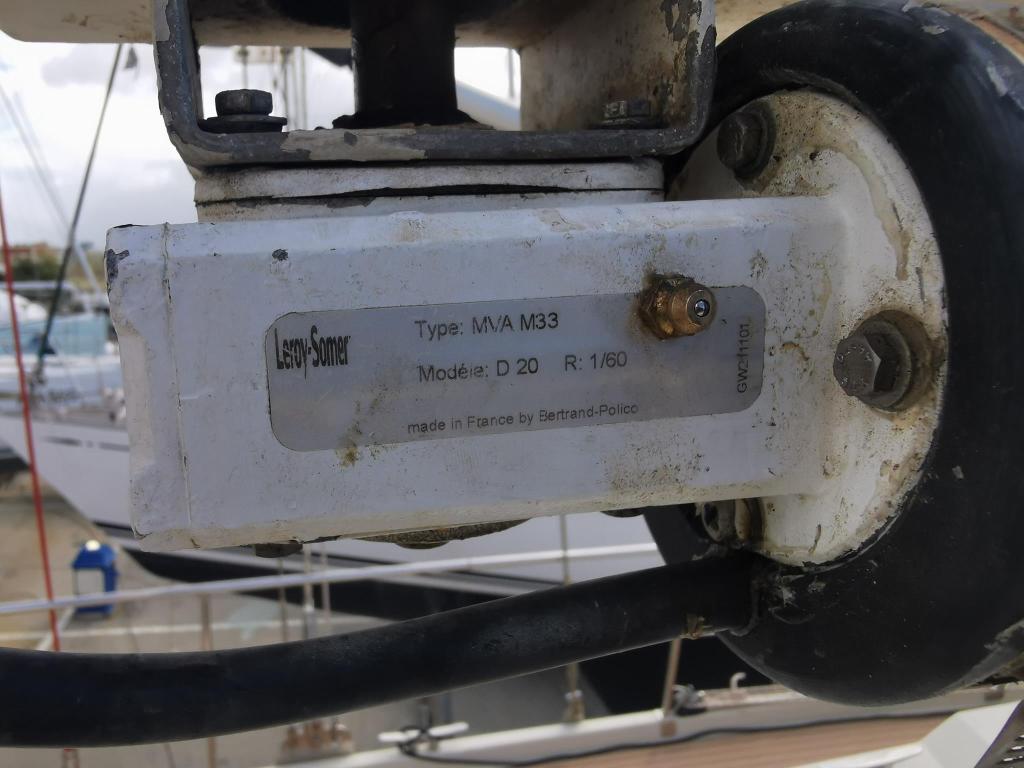
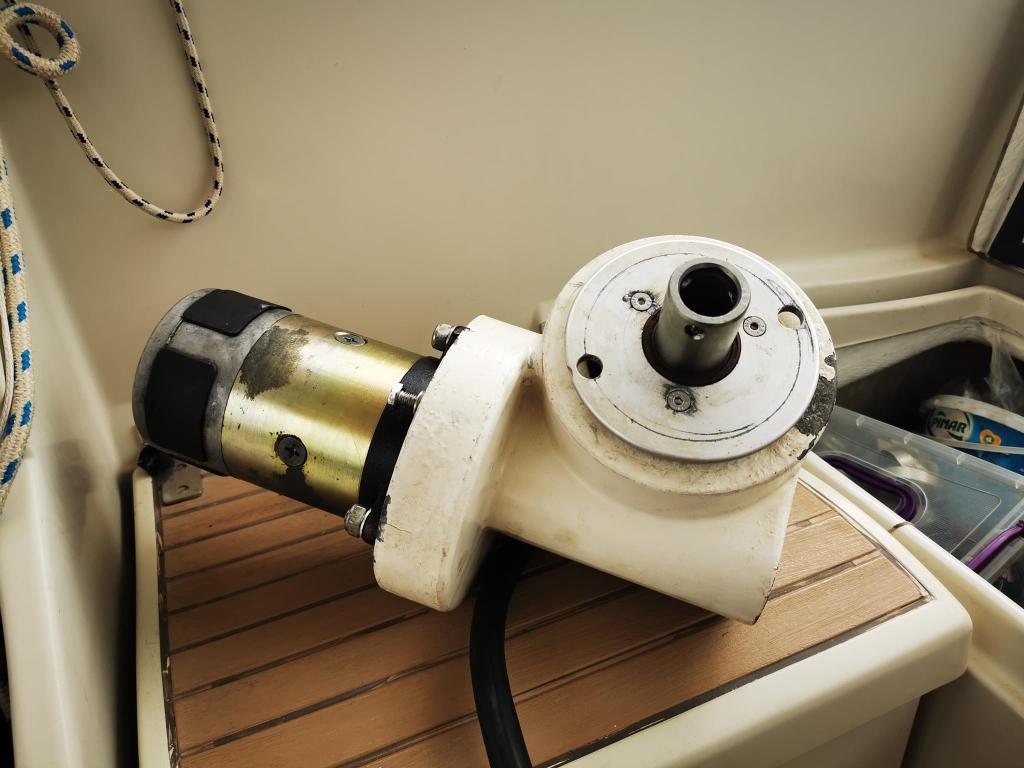
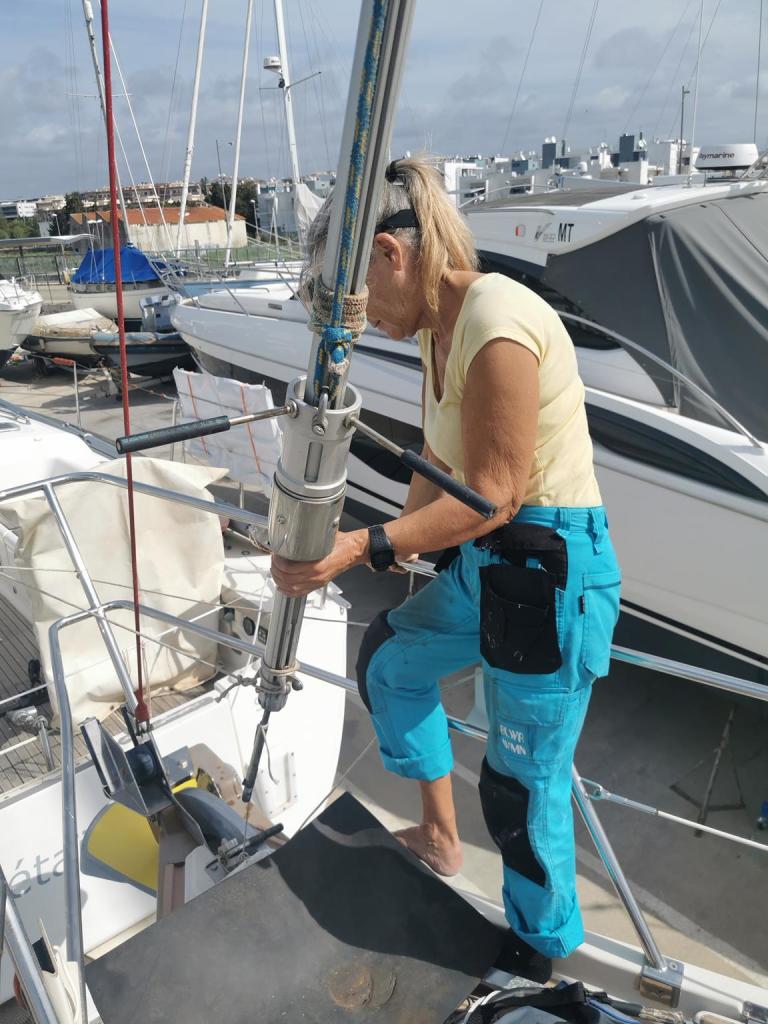
Last year I replaced the two gearboxes for furling of the main sail. Unfortunately last fall I found that the gear box shaft already has started to corrode, so I had new shaft made in 316 SS
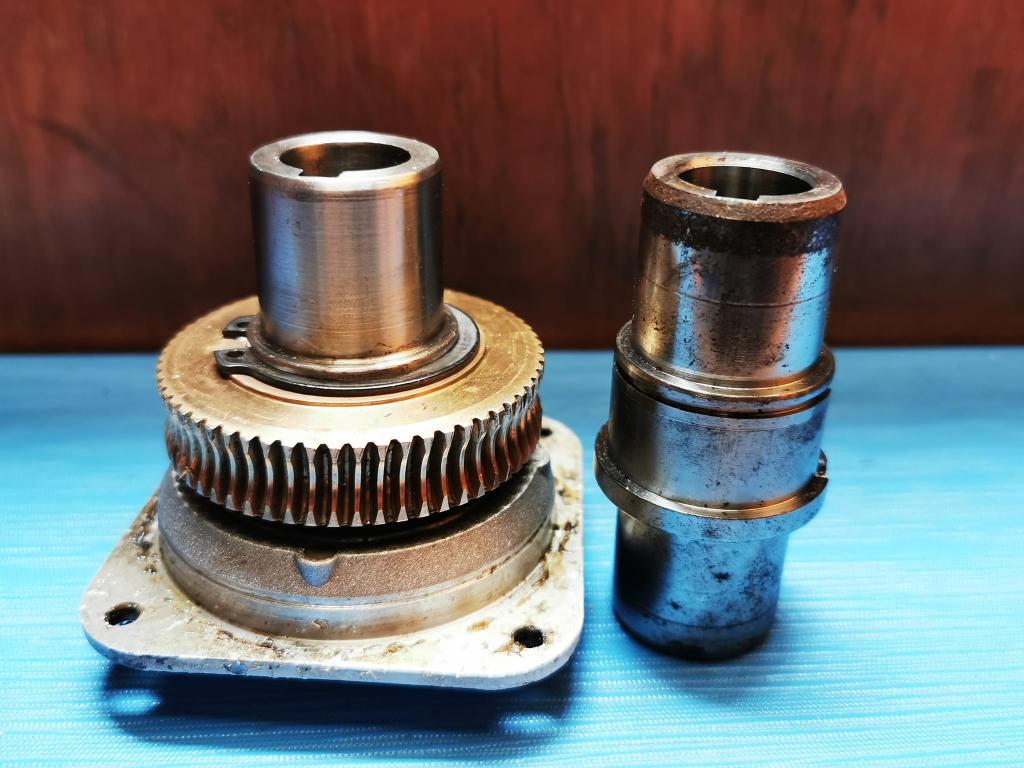
It was a great disappointment to notice the corrosion, look at the shaft to the right it has corroded already at the top and the bottom which are exposed to moist air. I had a lot of job and cost last year to install new gear boxes, and thought it was long time to next major overhaul of the gearboxes, but no.

While I was at it, I installed grease nipples, before it was oil inside.
The head furler also need to be serviced with new lip seals and bearings, but that I outsourced, as well as replacing the timing belt and raw water circulation pump on the VP TMD 22 engine
Found this when taking of the cover, there was some Sikaflex like substance on the cable, when removing that, the cable cover just fell off? More work! but in the end a rather easy job, a high quality shrink tube made the job


Now back in place and with new paint as well
It is a heavy piece to put back total weight well over 20 kg
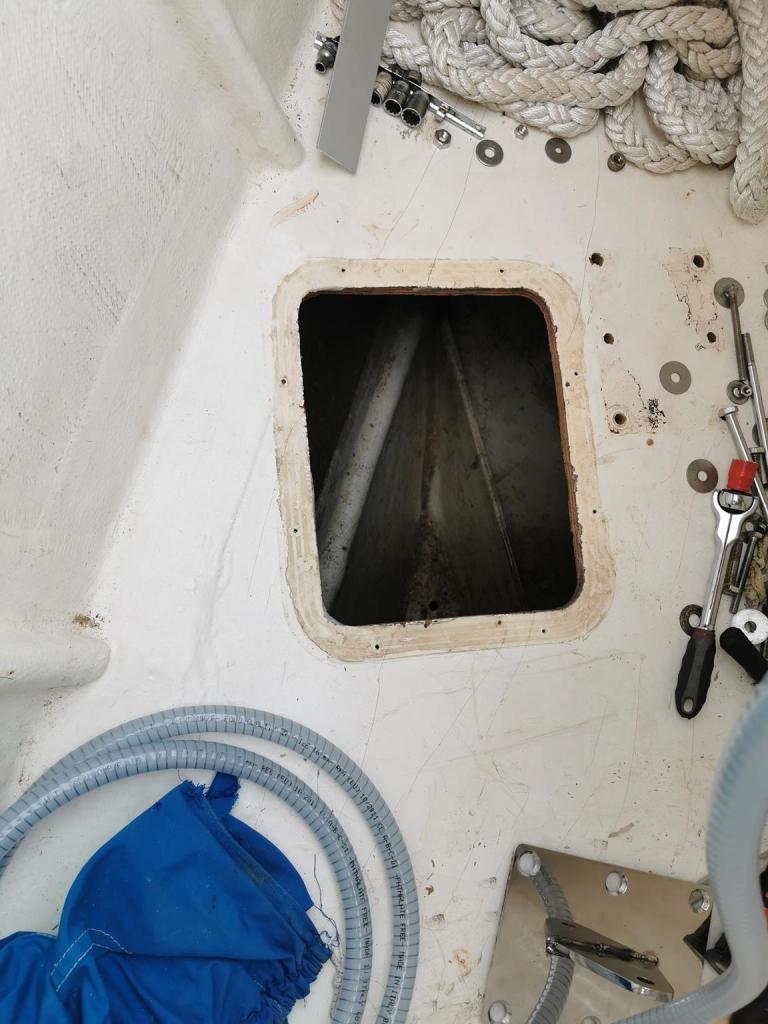
A major challenge

The cutter stay is going down and is fastened to the floor in the bow locker. Probably due to a too large and too weak inspection hatch the floor has started to bulge. How to fix that? After a lot of thinking and a few sleep less nights I decided to have some substantial beams made to reinforce the floor and to spread the load to a much larger area.

The beams they go from side to side under the locker floor and there is a flange at the edge of the floor that support not only the floor but also the new beams. The beams are made by 3×18 mm plywood epoxy glued together, rather heavy stuff.
I can tell you it was many uncomfortable hours in the bow locker passing them through the hatch assemble them and trying to hold the beams with one hand and screw them into place with the other hand, Houdini himself would have struggle to do the job.
Finally, I got them in place, now the attachment point is bolted through the locker floor, the beams and the previous substantial backing plate.

Feels very strong, but guess the floor itself has to be replaced in the future, not uncommon on Super Maramus that the bow locker floor rotten due to the moist environment in the chain locker below
New cushions
We decided to replace the upholstery.
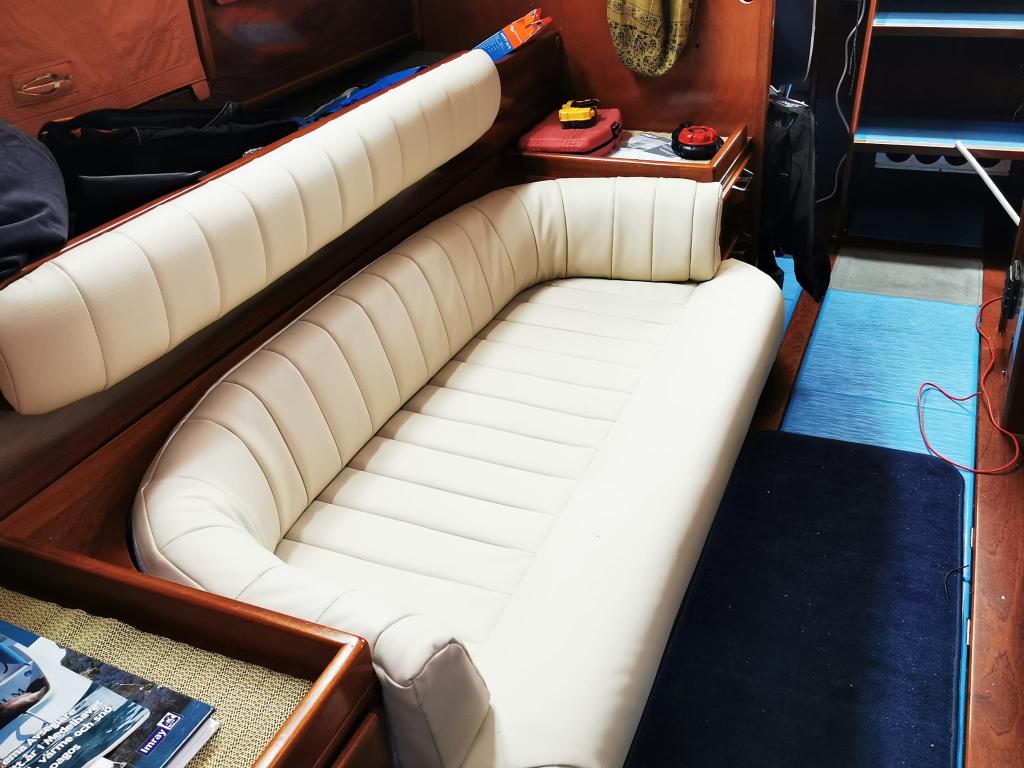

Looks very nice and bright.
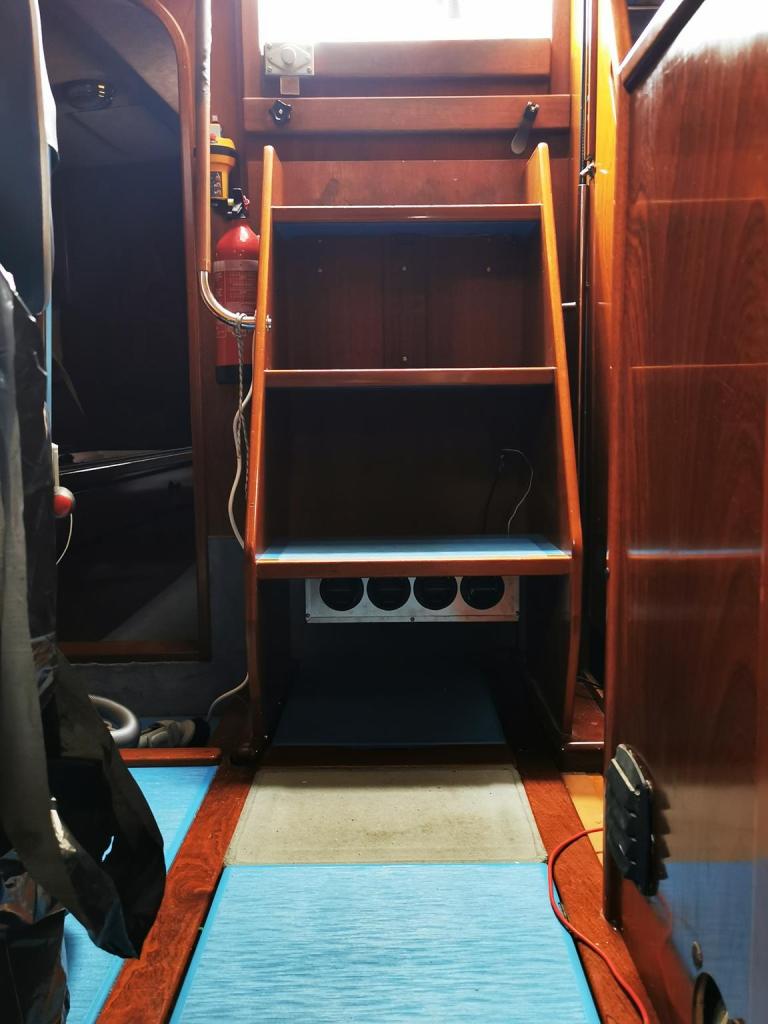
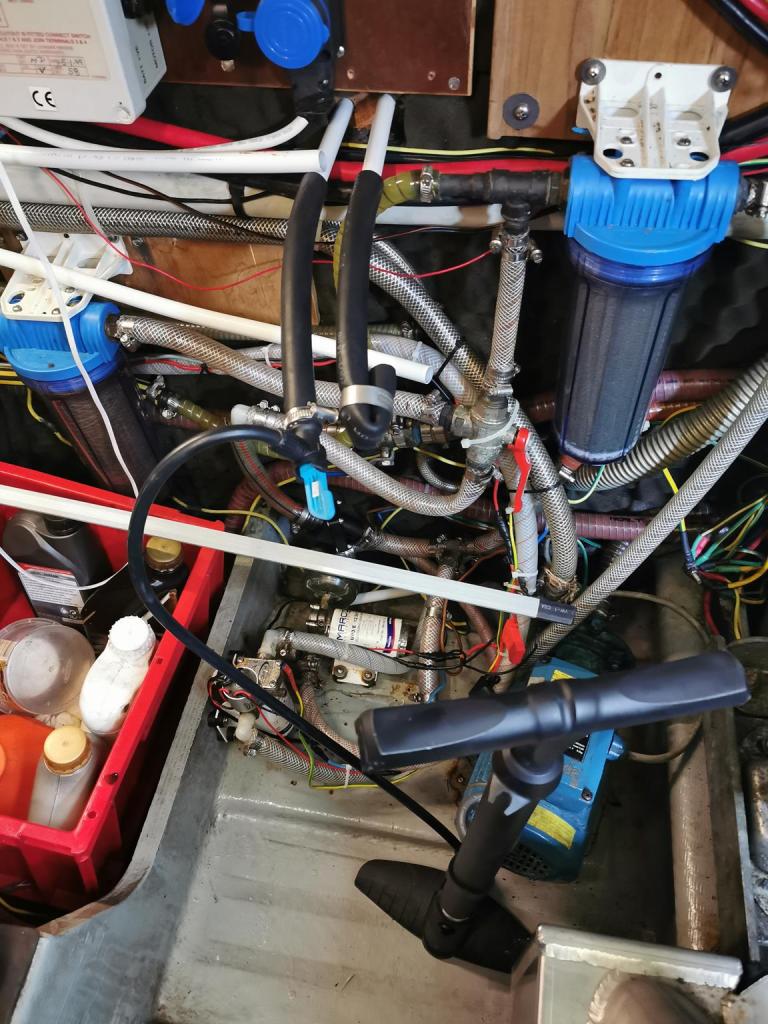
Some plumbing job
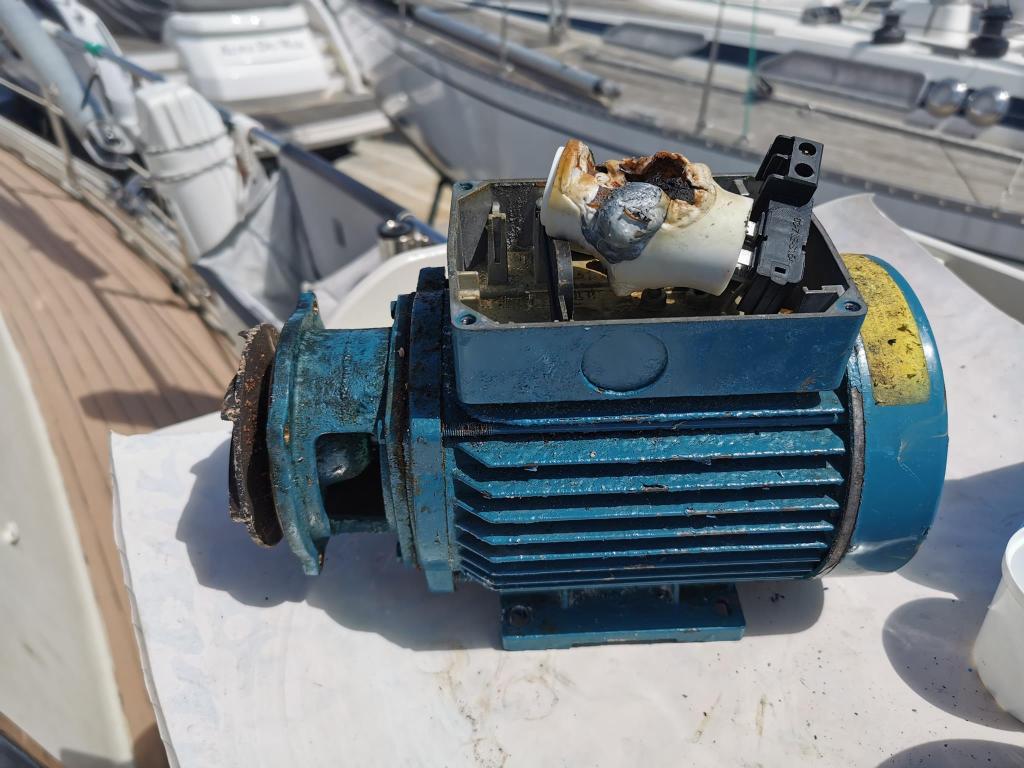
Old AC pump, the capacitor has melted down, I had a spare pump to install, while waiting for new capacitors to be delivered.
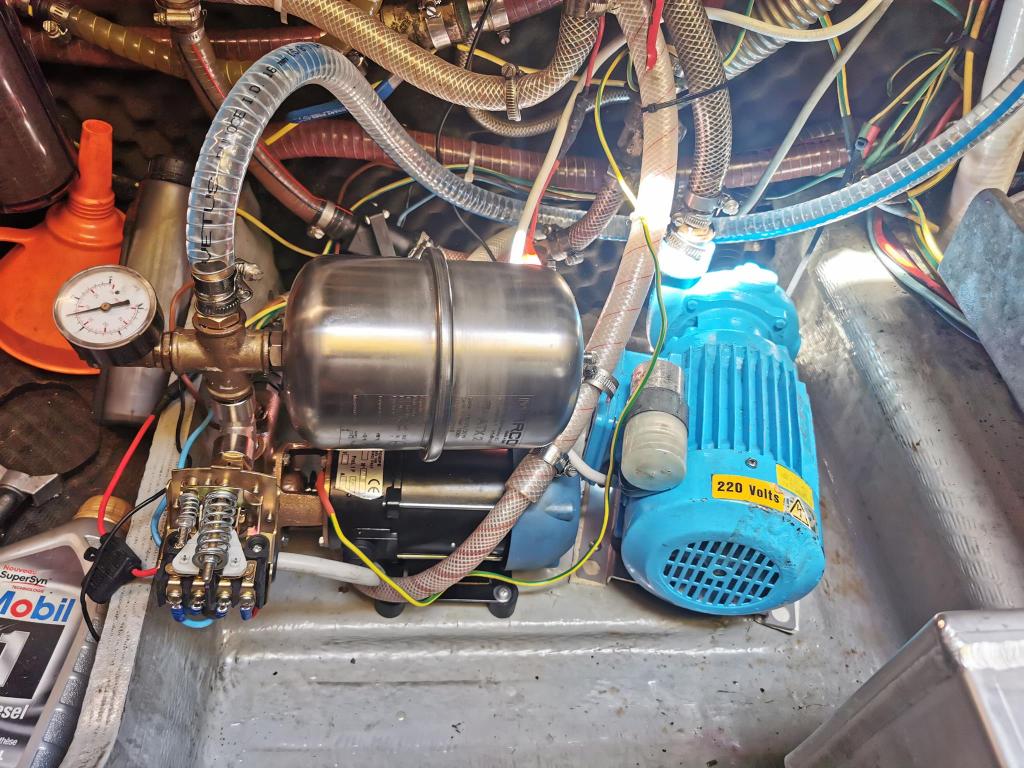
The New AC Pump, as well as a new fresh water pump, the old Marco pump felt unreliable
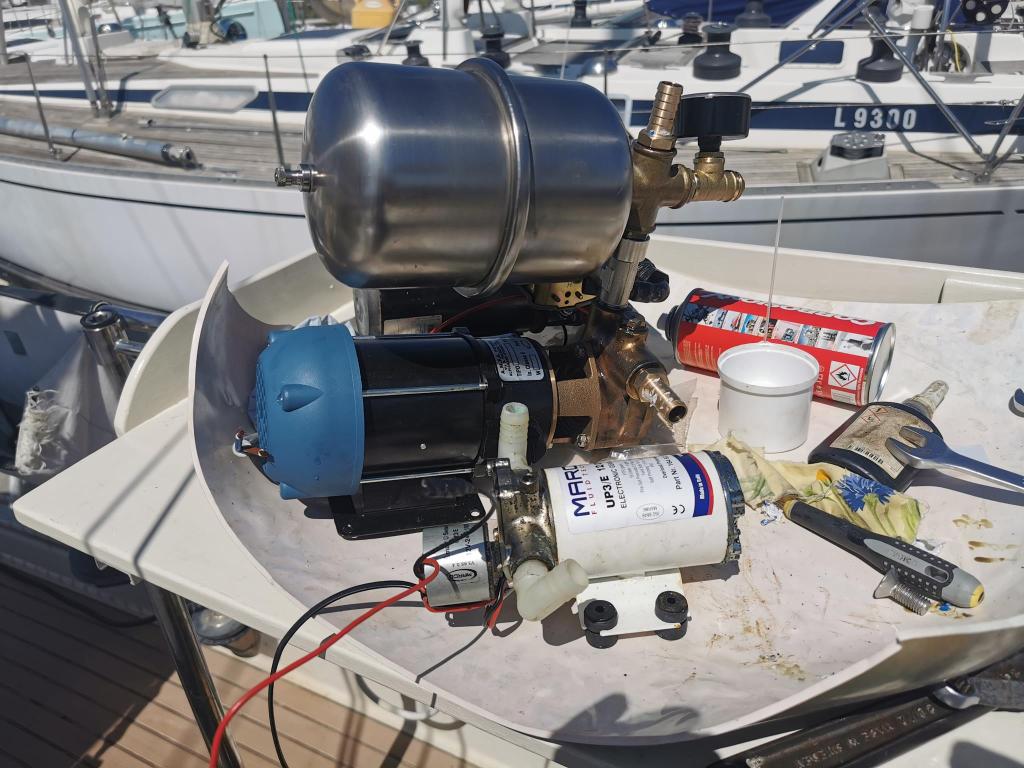
There is a huge difference in size in favour of the “old” Marco, which work with variable speed and should not need any accumulator tank, but I’m already in to the second one I a few years so went back to the original Amel set up, I had both a spare pump and a spare motor so decision was easy.
Heater
one of the plans for this year was to go to Nordkap, Norway, so I had long gone plans to install a heater, but I hesitated it’s a major projekt on an Amel with several water tight bulkeads, and also costly. We decided to only install a heat exchanger to get heat from the fresh-water cooling system from the engine.

This Isotherm heat exchanger is good for 10 kw heat, but now we have decided to go south so will not get much imminent use for it
I used PEX tube for the installation, looks very solid, used an ordinary bicycle pump to pressurize the system to identify any eventual leak.
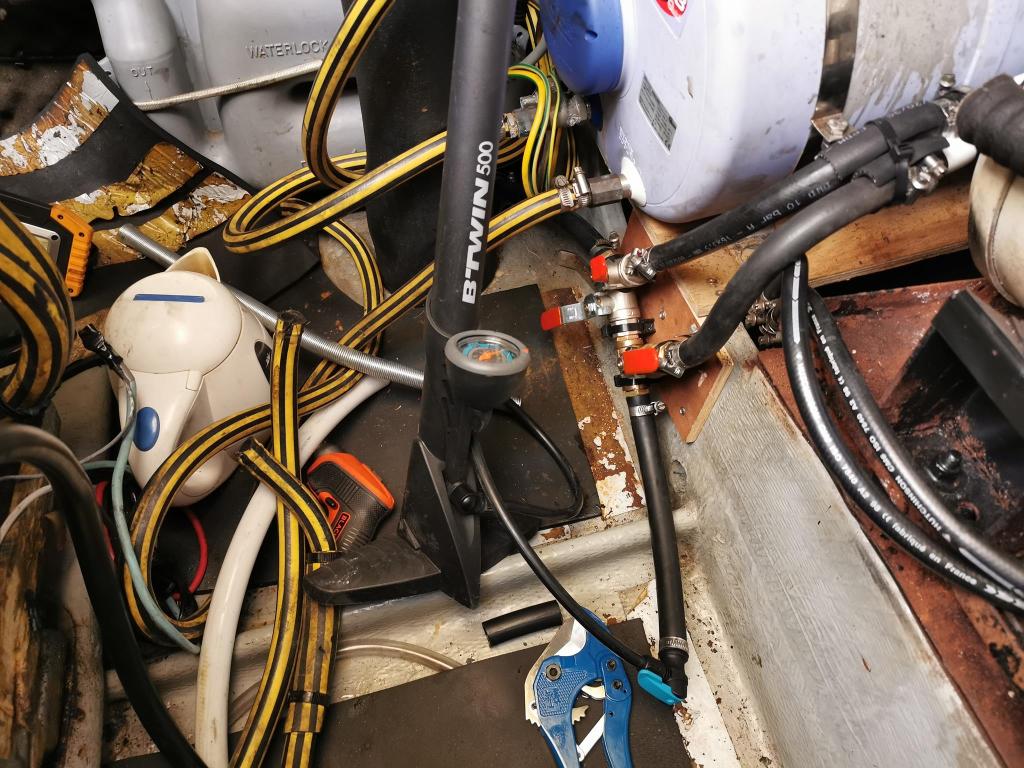
the hot water from the engine first pas the boiler for domestic hot-water, then to the heat exchanger for the cabin. The cabin heat exchanger can easily be isolated by two bal-valves in case any trouble occur in the installation, not to jeopardize the ability to run the engine, again I used my bicycle pump to pressure-test the whole system
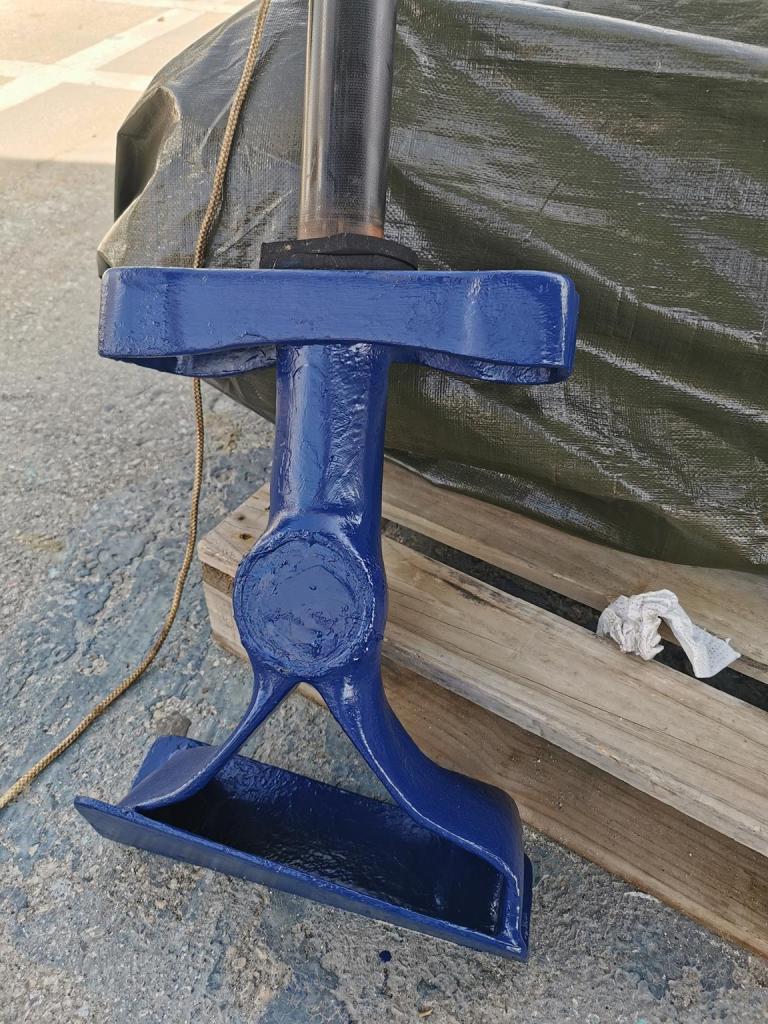
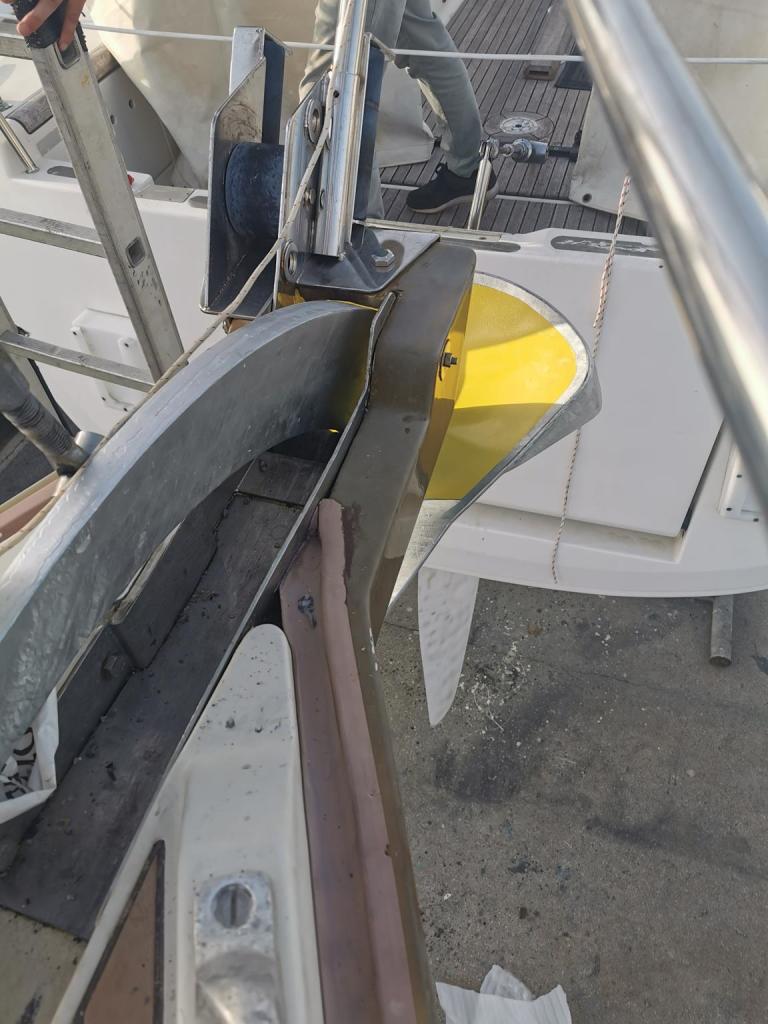
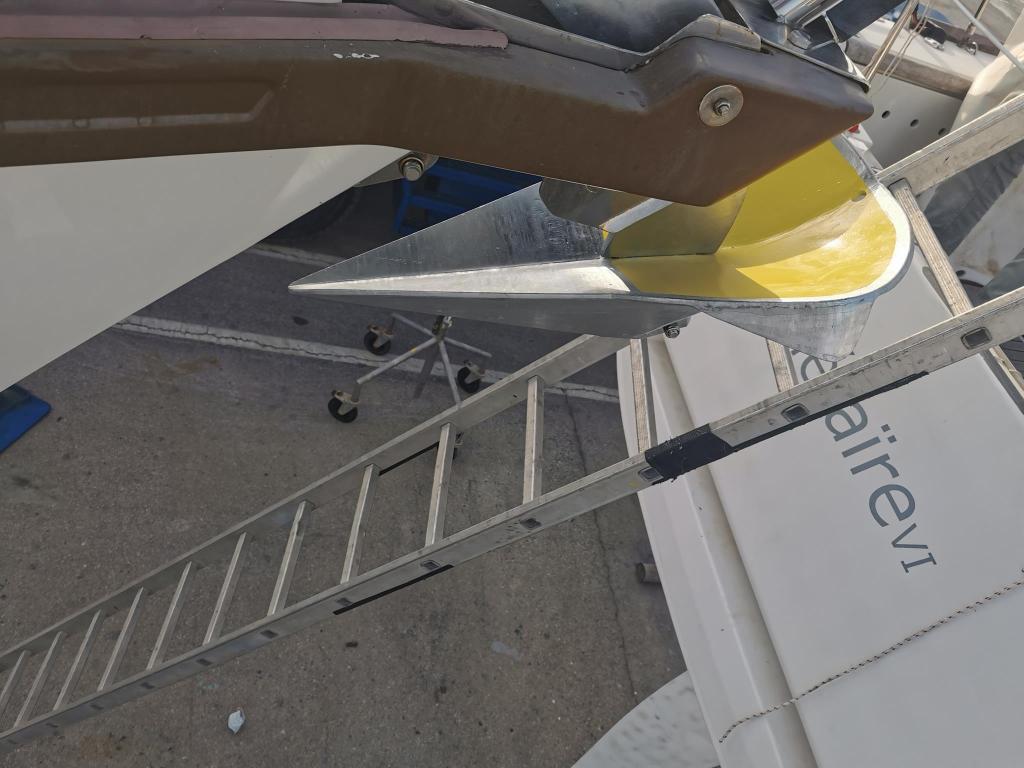
New anchor
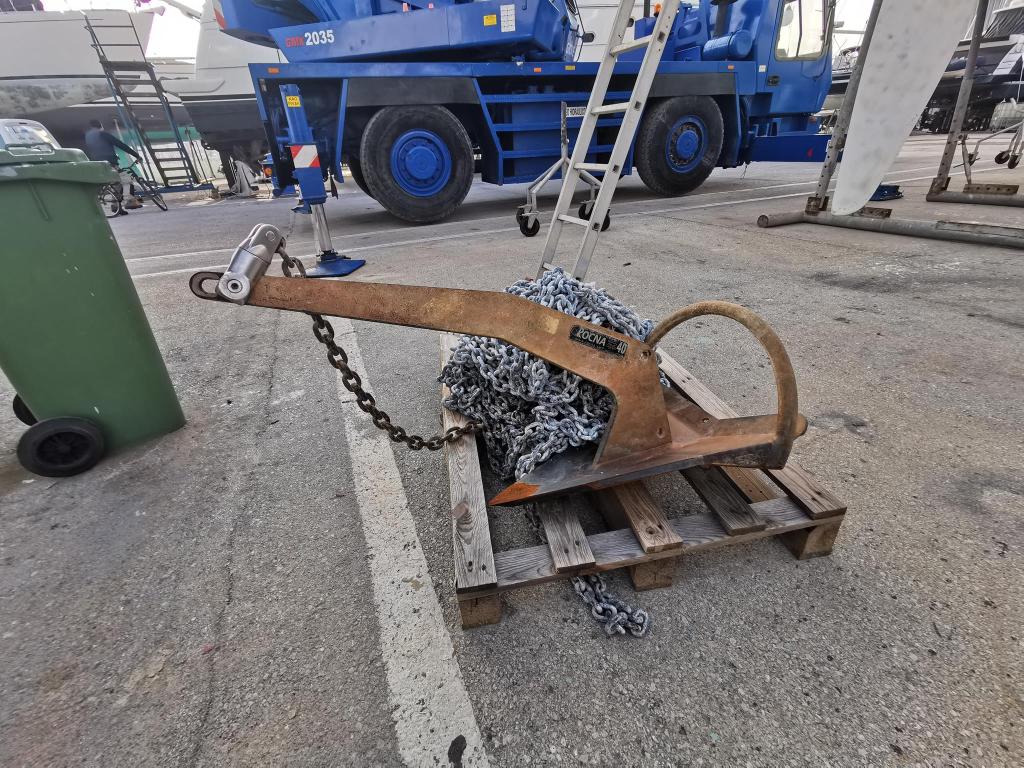
The Rocna anchor has beet retired due to poor resetting properties.

It is a rather big beast of anchor weigh 40 kg, one see it when in the car both, it has been replaced with a 45 kg Spade, and that after a lot of research on the internet for a more reliable anchor. Theed 45 kg Spade anchor fits very well on the anchor roller, no amendments needed.
This is not the complete list of works but I think I have bored you enough with the jobs we have done. It has been good to have Kerpa close to home and doing the job during Covid times, most other activities has been restricted. Our main activity has besides working on Kerpa, has been work-out to keep reasonable fit and to be able to work in extremely uncomfortable positions. Coming time we will spend between Lagos and Portimao for some remaning smaller jobs, and later we will go Vilamoura to replace the standing rigg, after that we are well prepared for extended cruising inclusive crossing the Atlantic again

You must be logged in to post a comment.